 Live link: textured-design
Live link: flat-design
Live link: visual-design
My final designs for this project can be seen above or you can visit the live links listed below each image to view the website fully.
All my designs were built from scratch using a template I built during a previous project and edited in HTML/CSS using notepad++
I chose to redesign the James Bond Museum website in Sweden which I have also reviewed as par of the Bad website Review for this project; their current website was very cluttered and lacks any styling which left ample room for imagination in my designs.
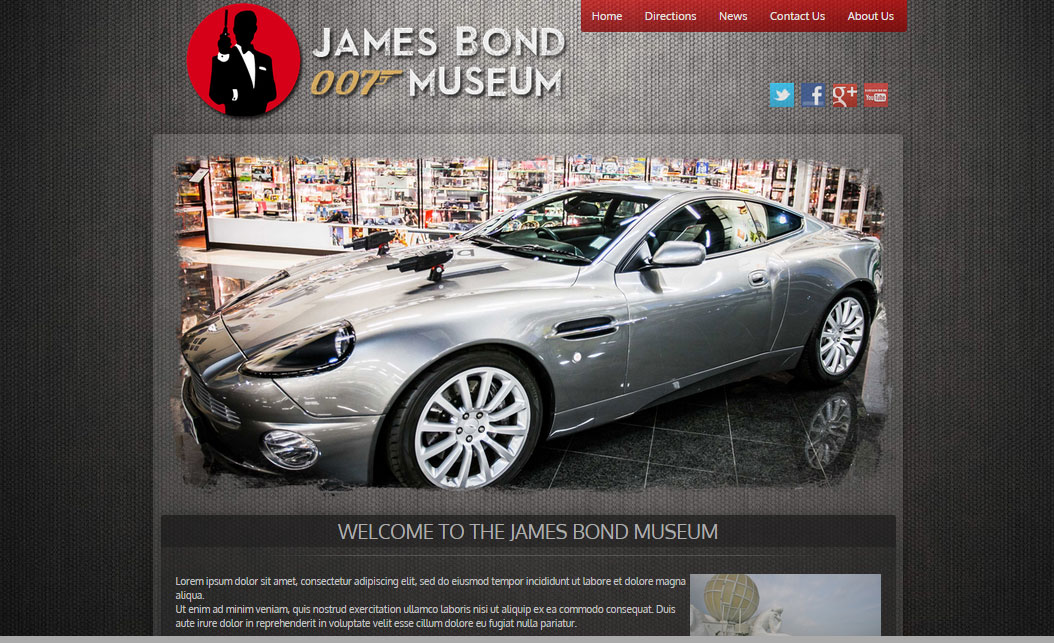
First Design; Textured
The first design I did was the Textured one, I started by looking at other museum websites for inspiration although none really fitted the atmosphere that a James Bond website should have.
After browsing around and sourcing several texture based images I created the website and positioned all elements within the source code as a base for my design.
Afterwards I applied a suitable website background image and I created the logo in Photoshop, I then decided to create a rotating banner on the homepage as this would add a dynamic element to the website. The images for the banner were edited by deleting the edges with a rough brush to create a textured “grunge” style look.
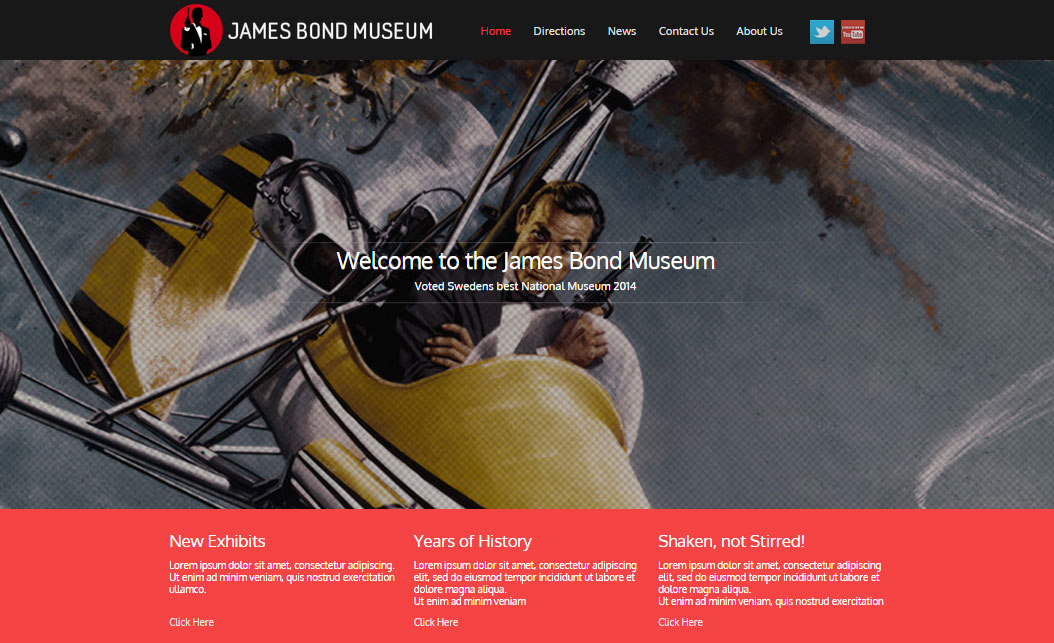
Second Design: Flat
The second design is one I liked most myself due to the (semi) professional look and the clean and modern feel.
Again I started by sourcing images to use as well as visiting several websites that were using a flat style for inspiration.
I edited the code-base for my website from the previous design to be full-width and dynamically scaling and created several divs within the container for the content (this was surprisingly very difficult/time consuming to code and get right).
I then created the logo and positioned it at the top together with the navigation and social media icons.
The rotating banner script was also amended to work full width and I positioned a div on top of it to display the “welcome” text for the website.
Finally I styled each div individually and added text and an image to fill in some of the site’s information, I didn’t manage to copy any of the existing text as everything is in Swedish on their website which does make the homepage look a bit sparse.
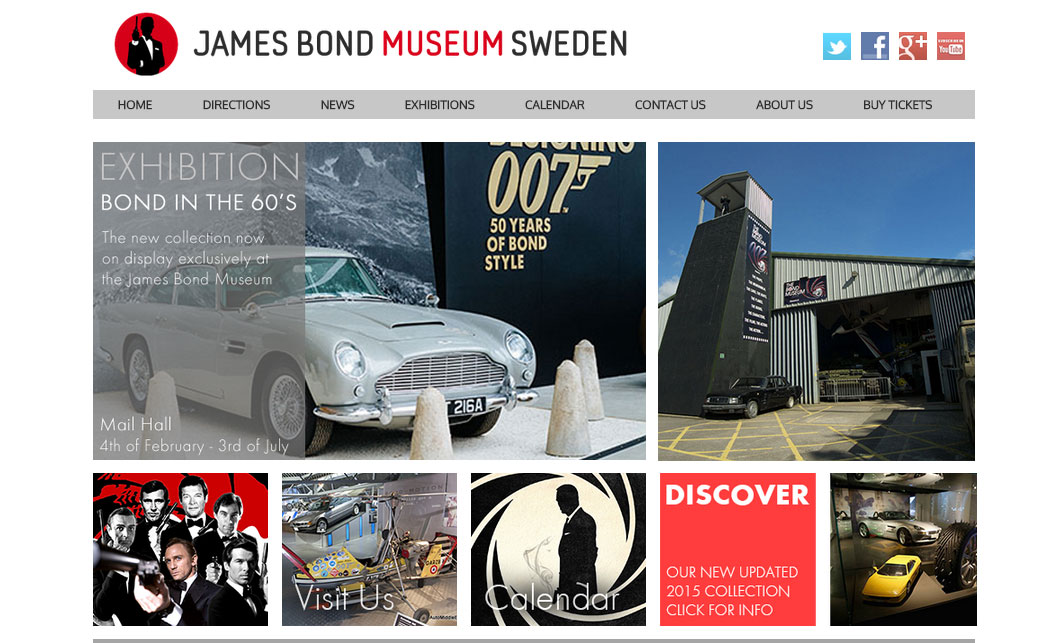
Third Design: Visual?
I’m not too sure what to call this style so I chose for “Visual” as there is a lot of imagery which I thought would suit.
For this design I decided to create a more visually engaging website which focuses on Simplicity, I started off by again modifying the template I used before to create several divs to house the images I was planning on using.
I kept the background to a plain white color as this made the images pop out and provided a clean and professional look.
The rotating banner was once again included although I chose to overlay text onto the images in this instance and use it as a main announcement section for this style.