Website production – My final design

Standard

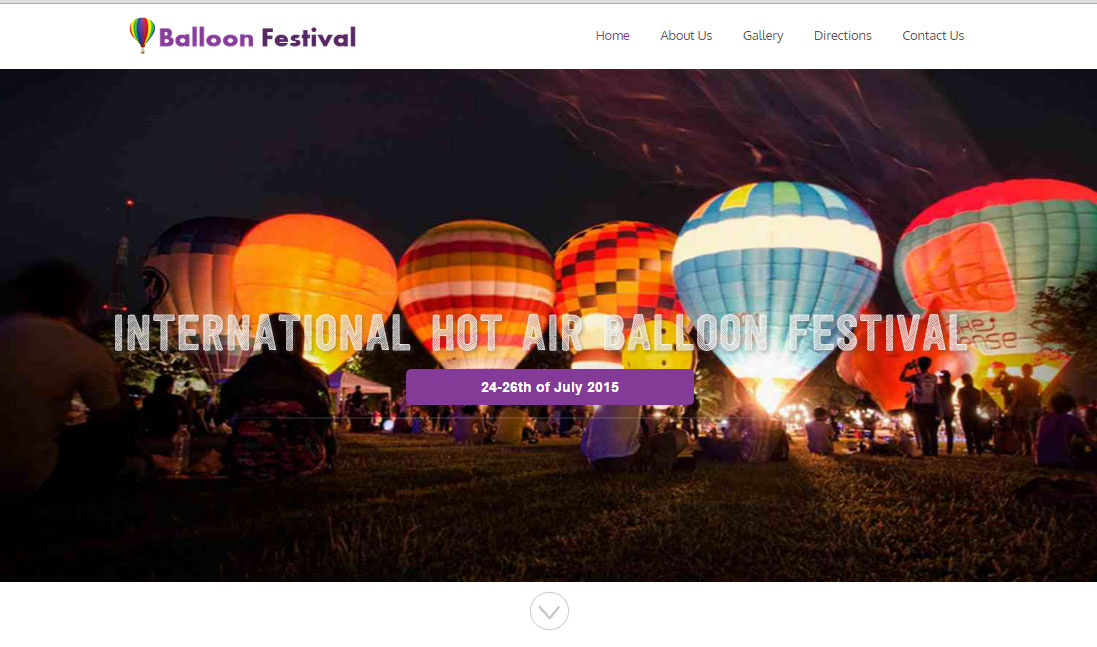
After a lot of thought, I decided to create a design for a Hot Air balloon events website as this seemed like an interesting subject that would leave me with a lot of room for experimentation both in terms of style and imagery.

My first step was researching the design style I wanted to use for my website and eventually I settled on going for a flat design style across one page with different sections for all content.
I opted for this style as I am a big fan of the newer sleek and professional looking websites that are currently out there such as Twitter, eBay, Instagram and many others.
I also thought a one page informational site would most likely be sufficient for a website dedicated to an event.

After the research phase I started by creating the logo in Photoshop which I based off of several examples I was able to find using Google Images.

The final logo can be viewed below:

The logo text went through several design revisions as I changed font and colors but eventually I decided on a two-tone shade of purple for the text as this played well with the existing colors.

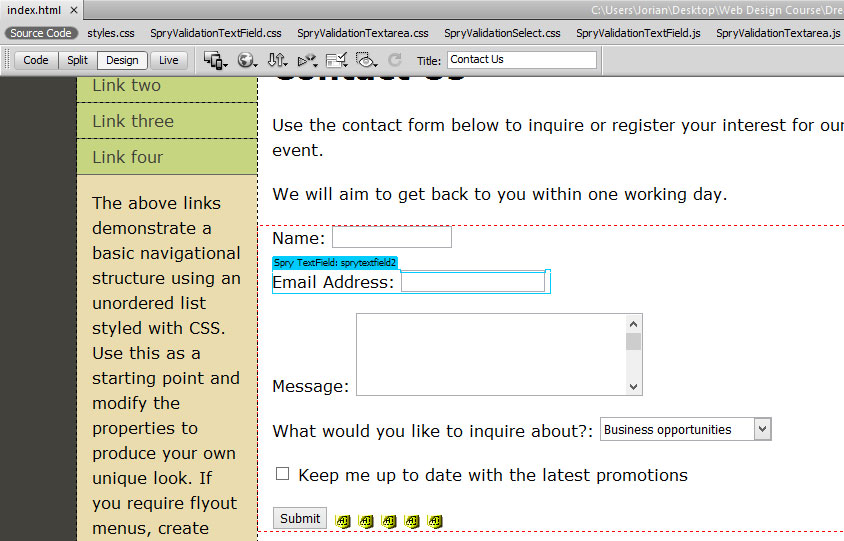
I used several scripts in my website/project to add smooth anchor scrolling, rotating banner images and a “back to top” button as well as a functional gallery.

My final live design can be viewed by clicking the link below the screenshot.

hot-air-balloon-sample


Link: https://www.jorian.co.uk/citycollege/balloon-site/

Website Production: Target Audience Analysis

Standard

In this task I was asked to perform an Analysis of the target audience for my “Hot air Balloon events” website,

I have written my answers to the various questions that were asked below;

    • What age? – The age of the visitors to this website would vary wildly from anywhere between the ages of 18-75 although most likely it will be more focused on middle-aged people as Hot air ballooning
      isn’t yet a thing all the kids rave about!
  •  What Technical Ability? – I reckon it is best to keep the website simple yet very informative in order to appeal to the largest audience possible and to cater for those that are not very computer literate.
  • What kind of Interests would your visitors have? (Newspapers, Magazines etc.) – I think most visitors to this particular website would be interested in Nature shows and magazines and perhaps outdoor activity related articles. I would image people that like Hot air Ballooning to be adventurous which is why i think a colorful and graphical website would work well.

Workshop: Embedding a Contact form

Standard

This week we looked at creating and embedding a contact form within a website in dreamweaver by using an external script.

We started by creating a new project using the defautl template in html5 and after we were provided with the script to use (ProcessForm from mindpalette.com)

The first thing that needed to be done was to open and edit the php file included to change the email address that the script uses to send the form-text to.
An example of where to change this can be seen in the screenshot below.

processform_screenshot


After this we created the form within dreamweaver using the “insert -> form” menu.
There are several different options to choose from and you can choose between a form that validates its entry and one that accepts any kind of input.

My form can be seen below and it features a text area, email address field, checkbox option and dropdown selection.

contact-form

The page can also be viewed here: /form-design/ (although I would appreciate it if spam was kept to a minimum ☺)

Workshop 3: Basic page Linking and anchors in Dreamwaver

Standard

In this workshop we were given the the task of creating various types of links within a new Dreamwaver project and successfully inserting a script into one of the pages to smoothly scroll between sections of text.

We started with a single index page after selecting the right folder to use within Dreamweaver and we then added a logo image and text/images to the page.

index-page

After this was done we created two additional pages and we linked them to each other by means of the navigational menu at the left hand side.

After linking the pages we were taught (well.. I must admit I did not learn anything new here) to add a hyperlink to an off-site and on-site page and finally how to add a script reference to the <head> of the page. Once the script was linked we started creating anchors for several headings on the page with a link to them at the top which (by means of the aforementioned script) smoothly scrolled to each section.

anchor-text


The whole project can be viewed in its final form at: /project-3/

Workshop 2: Writing HTML

Standard
<!DOCTYPE html PUBLIC "-//W3C//DTD XHTML 1.0 Strict//EN" "http://www.w3.org/TR/xhtml1/DTD/xhtml1-strict.dtd">
<html xmlns="http://www.w3.org/1999/xhtml">
<head>
<title>Example Html page</title>
<meta http-equiv="Content-Type" content="text/html; charset=utf-8" />
</head>
<body>
<h1>Heading One</h1>
<p>This is some text</p>
<img src="/image-path/image.jpg" alt="Alt image">
<p><a href="mailto:test@test.co.uk">test@test.co.uk</a></p>
<p><a href="http://www.google.co.uk" target="_blank">GO to our new website</a></p>
</body>
</html>

Seems self explanatory? 🙂

Workshop 1: Looking at the Code

Standard

We were given the task of looking at the source code of a website to identify and familiarize ourselves with the various elements that make up a page.

I chose Dafont.com and the following are a few questions that were asked:

Body section of code

Is the site using tables or divs? Divs
Is the site using h1 and h2 heading tags? yes
Is the site using alt tags for images? yes
Is the site using descriptive folder/file names? yes

html-type


alt-text